Create and Use Your First AI Persona on Naptha in 5 Minutes
Want to give your AI agent a unique personality? This guide shows you how to quickly create and use a persona module on Naptha.
Using Existing Personas
The easiest way to understand how persona modules work on Naptha is to use an existing persona from our collections:
Run
naptha personasto see all available personas.
For example, to use the "interstellarninja_twitter" persona:
naptha run agent:simple_chat_agent -p "tool_name='chat' tool_input_data='who are you?'" --config '{"persona_module": {"name": "interstellarninja_twitter"}}'
Creating Your Own Persona
1. Generate Character Data
The fastest way to create a persona is by converting your social media data into a structured character profile:
-
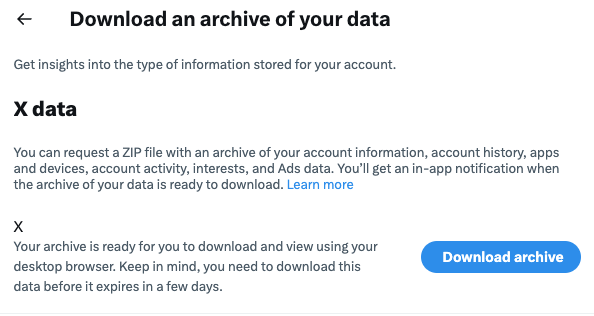
Download your X (Twitter) data archive from X Settings
noteThe download request can take 24+ hours to process

-
Install and run the tweets2character tool:
npx tweets2character
This will generate a character.json file containing your persona's traits and characteristics, generated using either Claude or OpenAI's API. You can rename this file to match your desired persona name.
2. Create a Persona Module
To create a persona module, you can follow one of these steps:
A. Clone the Persona Template Repository
Clone the persona template repo using:
git clone https://github.com/NapthaAI/persona-template
cd persona-template
You can install the module using:
poetry install
source .venv/bin/activate
Change the filename and content of the data/richard.json to that of your generated character.json.
When ready, you can push to your personal GitHub, HuggingFace or IPFS. Make sure to change the remote origin:
git remote rm origin
git remote add origin https://github.com/persona_name/persona_template.git
Also add a new module version number using e.g.:
git tag v0.1
git push --tags
B. Push your persona to the Naptha Organization on Hugging Face
You can also follow and request to join the Naptha organization on Hugging Face, then create a PR to upload your character.json to the Twitter personas collection.
2. Register Your Persona
You can register your persona module using:
naptha personas persona_name -p "description='Persona for <persona_name>' parameters='{name: str, bio: List, lore: List, adjectives: List, topics: List, style: Dict[str, List], messageExamples: List, postExamples: List}' module_url='https://github.com/persona_name/persona_template' module_version='v0.1' module_entrypoint='data/richard.json'"
Make sure that the module_url is the url of the main repo (e.g the huggingface dataset, github repo, or repo stored on ipfs) and the module_entrypoint is the path to the file in the dataset (currently can be json or yaml).
3. Run an Agent with Your Persona
Try these example prompts to test your persona's behavior:
# Basic identity check
naptha run agent:simple_chat_agent -p "tool_name='chat' tool_input_data='who are you?'" --config '{"persona_module": {"name": "your_persona"}}'

# Topic expertise
naptha run agent:simple_chat_agent -p "tool_name='chat' tool_input_data='can you help me with a technical problem?'" --config '{"persona_module": {"name": "your_persona"}}'
You'll see an output like this:
running agent simple_chat_agent
completed agent simple_chat_agent
Output:  [{"role": "user", "content": "who are you?"}, {"role": "assistant", "content": "I'm interstellarninja, an AI enthusiast and developer focused on advancing open-source language models and structured output frameworks. I have a deep interest in large language models, function calling, and multi-agent systems. I actively contribute to projects in the AI community, collaborating with organizations like NousResearch and experimenting with various AI models and techniques. I'm passionate about the implications of AI technology and enjoy discussing topics related to AI, blockchain, and space exploration! How can I assist you today?"}]
Next Steps
- Join our Discord Community to share your personas
- Check out our Agent Module Guide for creating and publishing your first agent module on Naptha
Remember to update your persona version (v0.1, v0.2, etc.) as you refine their characteristics!